Visitors is a feature that allows Building Administrators to check in and track visitors to the property.
STEP 1: Select The Visitors Feature
Navigate to the features panel along the left side of the screen and select “Visitors.”

STEP 2: Create a New Entry
Click the navy blue “+ Add a Visitor” button in the top-right corner.

STEP 3: Enter the Visitor information
Complete the Visitor registration by filling in all of the applicable fields.
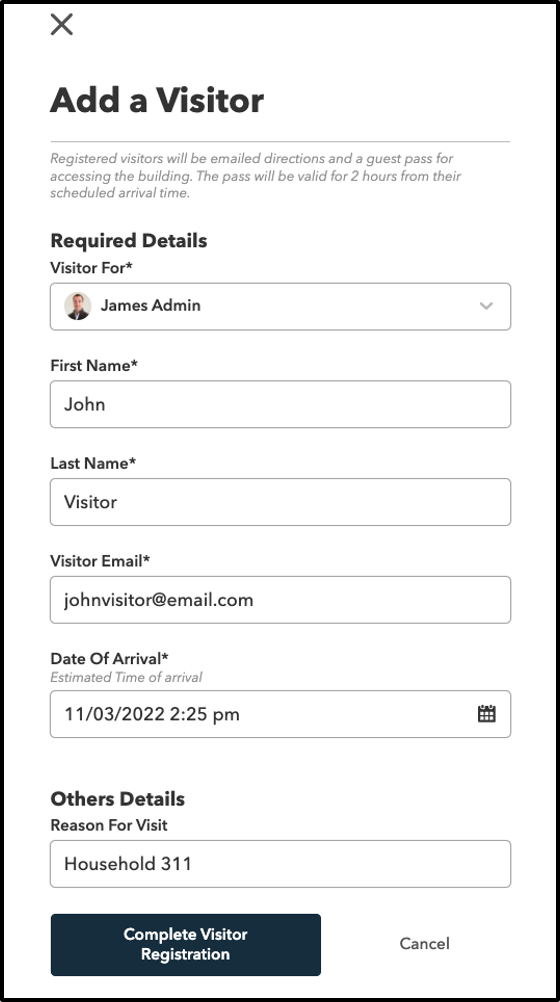
Don’t forget to “Complete Visitor Registration.”
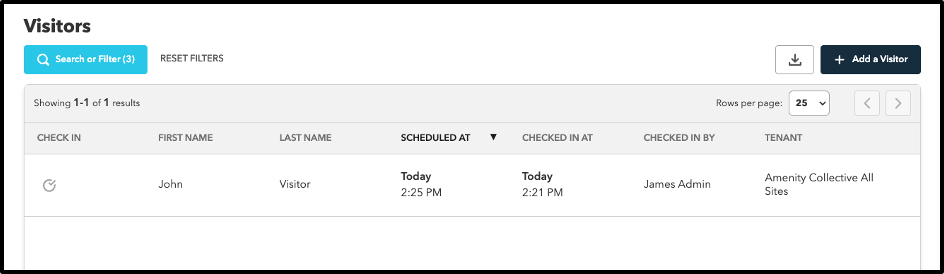
STEP 4: Review Visitors Table
Observe the Visitor table below. From top to bottom you will see a list of recent check-ins from newest to oldest.
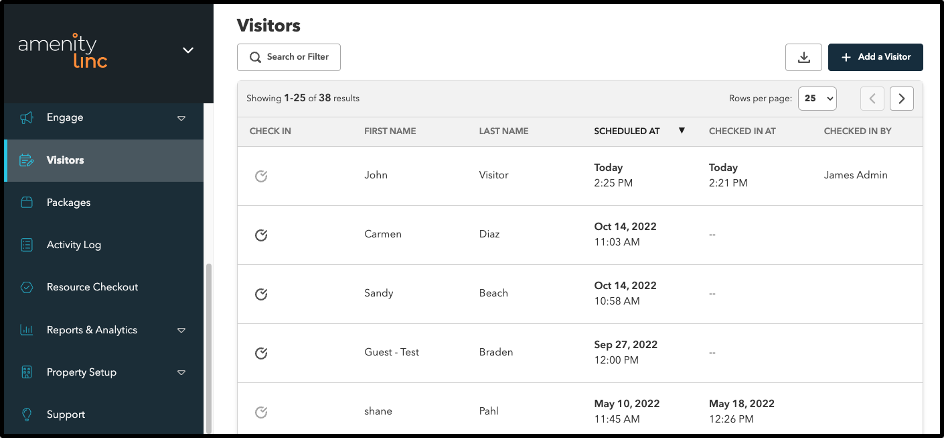
Under the Check-in column, to the top center-left, you will notice the circle with a checkmark. When the symbol is dark gray, it indicates the visitor has not been checked-in.
STEP 5: Check-in
When a visitor is ready to be checked-in, click on the dark circle/check mark. The symbol will turn light gray and the “checked in at” and “checked in by” columns will populate.

Most of the column headers are clickable which will automatically sort the table. For example, click on “Noted by” and the list will sort the “Noted by” in alphabetical order.
STEP 6: Search or Filter
In the middle top-left corner use the “Search or Filter” button under the “Visitors” header for focused searches. You are able to filter by several fields as you will see below. As soon as you type in the information, you will notice the table to the left will change to reflect the information you’ve entered.
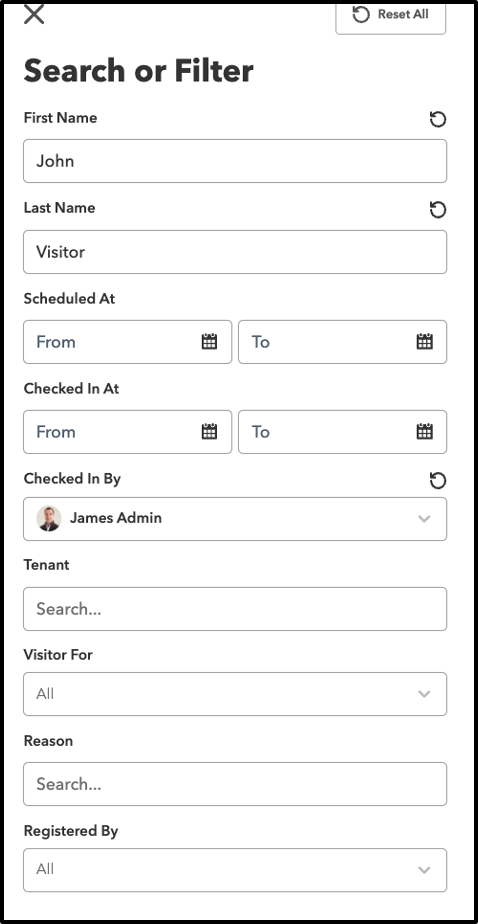
Either click the “X” above “Search or Filter or click anywhere to the left to return to the table.
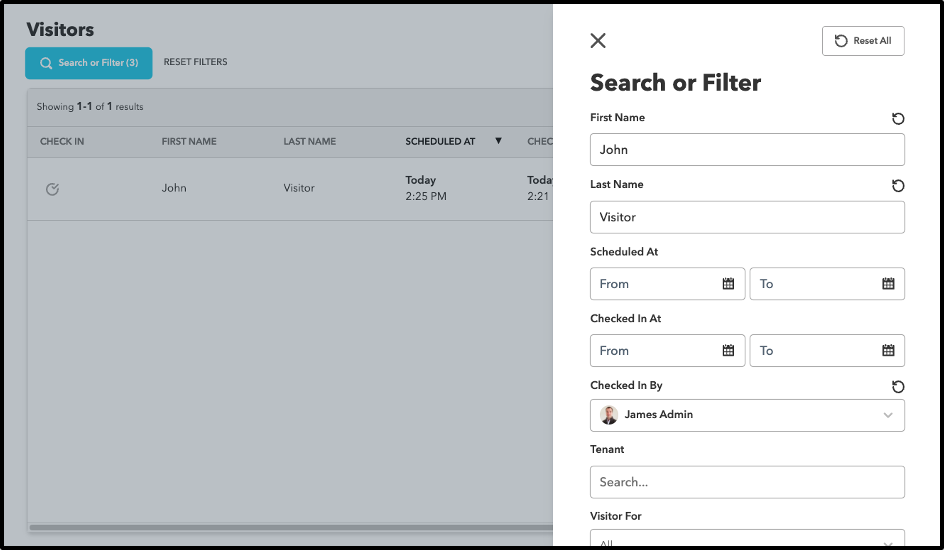
From here, examine your search results.
STEP 7: Download
If you need to download the activities logs, you may do that by clicking the download button in the top right corner near the + New Entry button. And finally, to clear any search filters when you’re done, select the “Reset Filter” in the top left next to “Search or Filter.”