COI Management is a feature that enables streamlined document management for all your vendor COIs. Know what vendors have submitted their COIs, their coverage, and the coverage’s expiry date all with a few clicks. No more deep dives through old emails.
STEP 1: Vendor Management
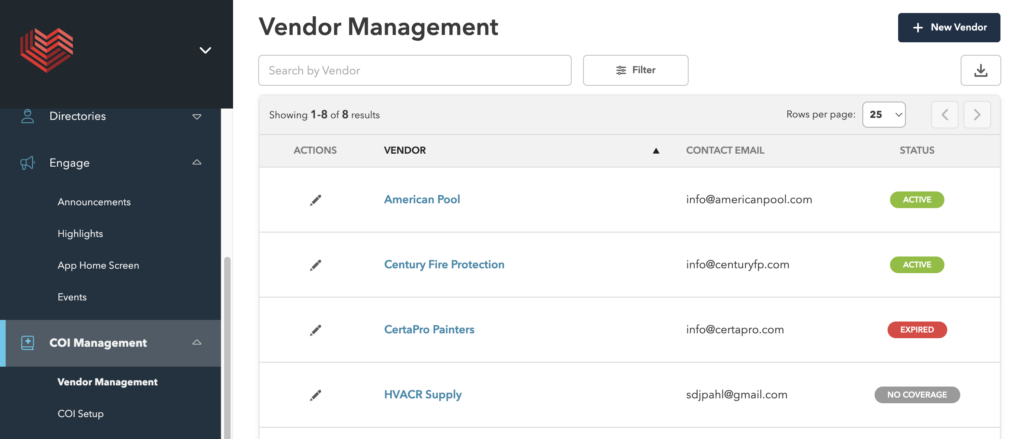
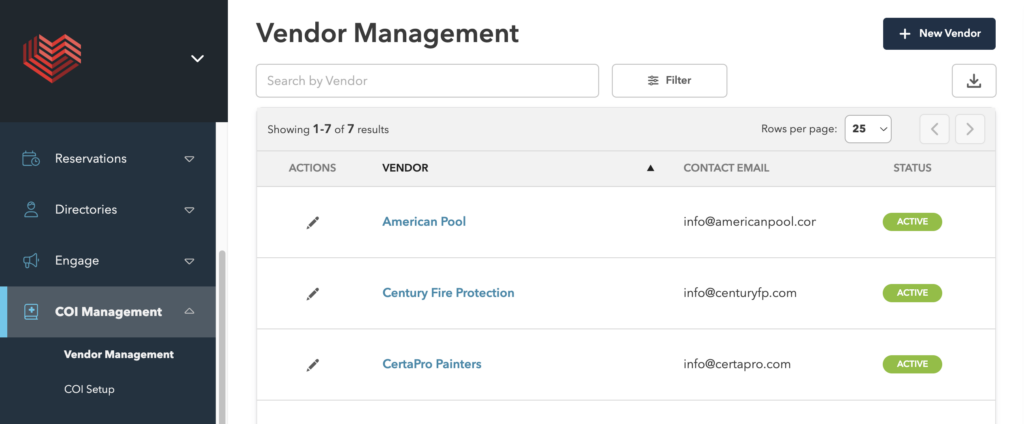
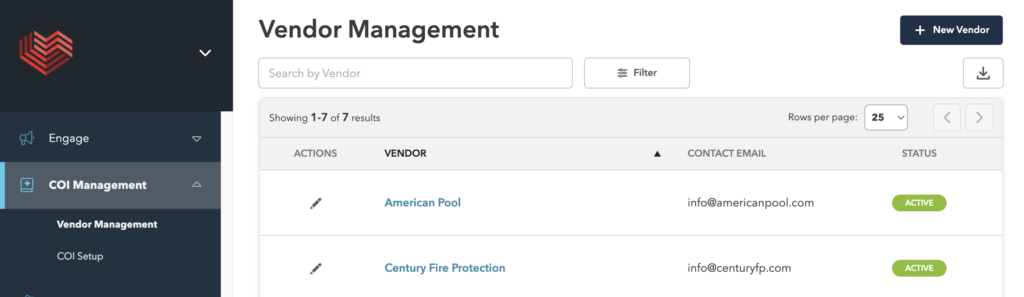
Navigate to the COI Management feature along the menu bar and click it to reveal the Vendor Management Subtab. Select Vendor Management. Below on the Vendor Management table, you will notice you can edit your current vendors list, quickly review their contact information, and their account status. You can search by vendor, and even enhance your search by using our Filter. Need to export a list, click the download icon to the top right. Finally, to set up a new Vendor, we’ll click on the blue New Vendor button in the upper right corner.
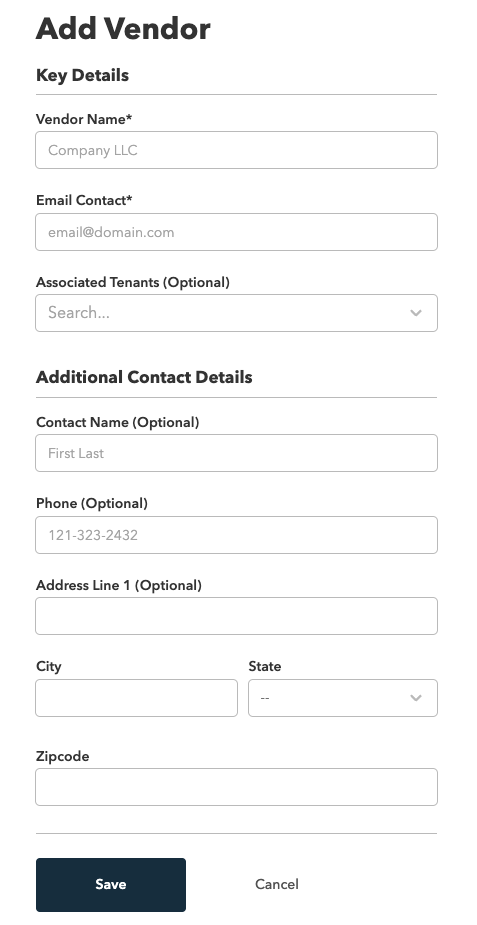
STEP 2: Add a New Vendor
After you select the Add New Vendor button, the following window will appear. Enter all available information and Save.
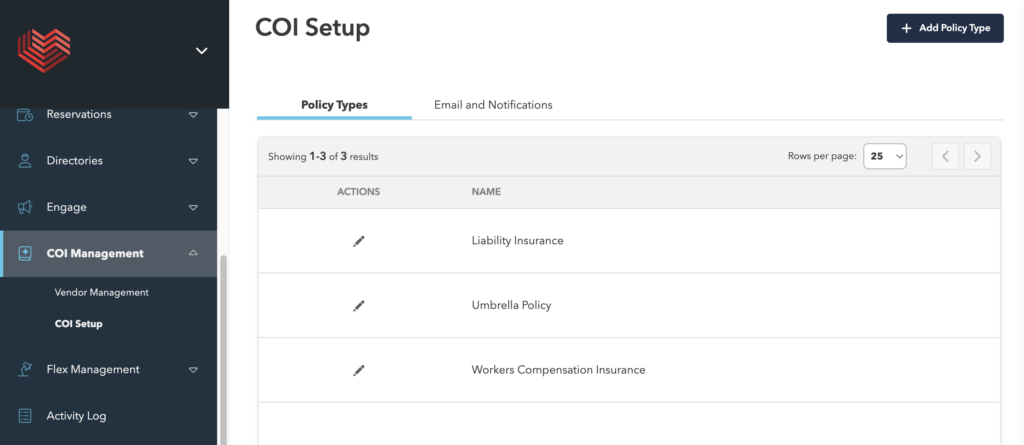
STEP 3: COI Setup of Policy Types
The next step is to complete the COI Setup. Under the COI Management feature, select the COI Setup subtab. On the COI Setup table, you will notice towards the top middle of the screen Policy Types are underlined as that is the default page you will land on. And below, you can create Policy Types or edit existing ones by selecting the edit pencil under the Actions column.
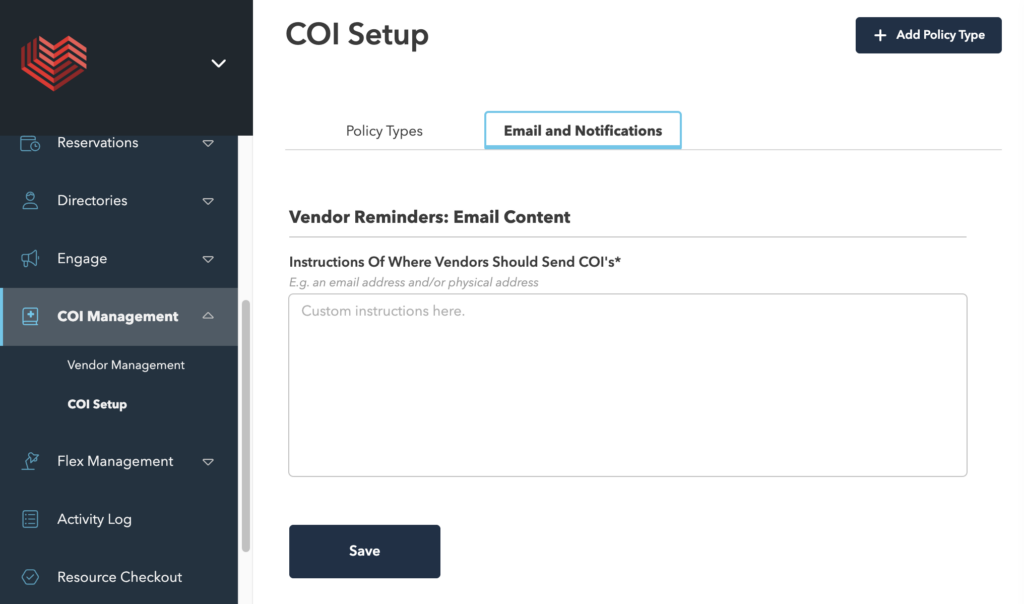
STEP 4: COI Setup of Email and Notifications
If you select Email and Notifications, your view will change to the following table. Here you can add the default message that Vendors will receive when a reminder is issued to them to provide an updated COI. Enter your custom message and Save. And the next step we’ll take is to Add Policy Type.
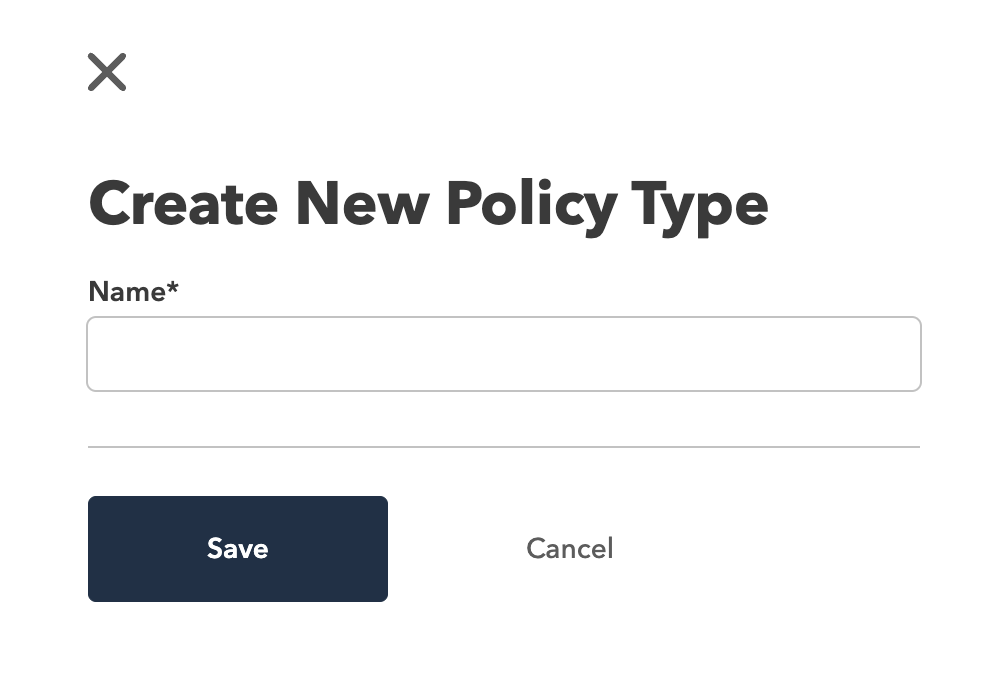
STEP 5: Add Policy Type
When you select Add Policy Type, the following window will appear. Simply enter the Type Name and Save.
STEP 6: Assign Policy to Vendor
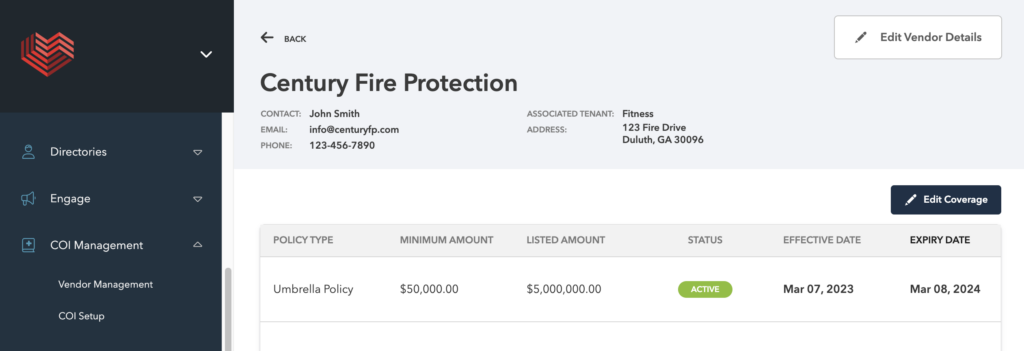
Next, we will select the Vendor Management subtab once again, and in this example, we will select Century Fire Protection by clicking on the blue Vendor name.
On the following screen, you will see the information along the top banner you previously populated for the Vendor details. If you need to make any changes, you can select the Edit Vendor Details button in the top right corner.
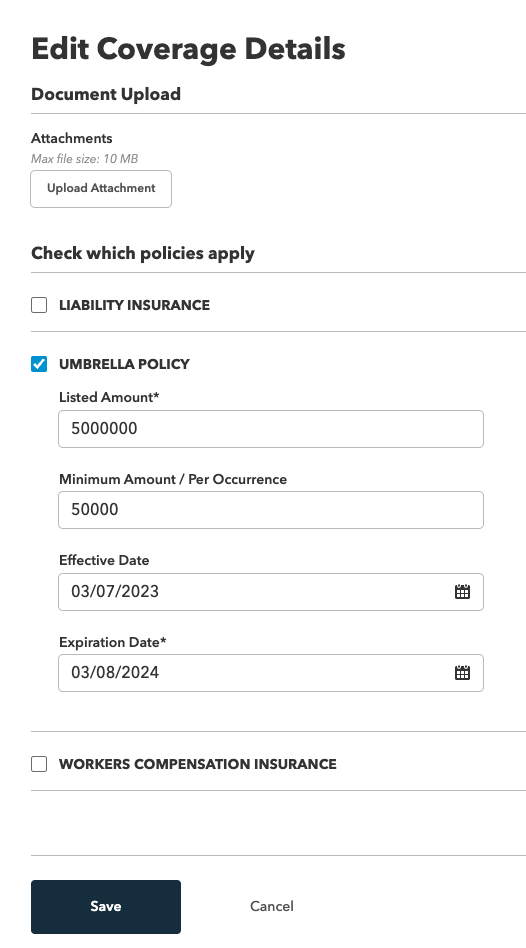
Below on the policy table, you can see that we already have an Umbrella Policy and we’re able to quickly see all of the essential information on this particular policy. To Add or Edit Coverage, select the Edit Coverage button to the middle, right of the screen.
Below you will see the following window to Add or Edit Coverage Details. If Adding, make sure to Upload and Attachment. You can check or uncheck each Type as appropriate. And if you’re missing the correct Type, make sure to go back and add that Type to COI Setup. Once you are finished, click Save and return to the Vendor Management subtab.
STEP 7: Managing Vendor COIs
The three types of statuses you can have are Active, Expired, No Coverage. If you view the image below, you will see exactly how this will appear. We will briefly now review what each status means, and what action you may need to take.
Active – An Active status indicates that given the information provided, the COI is within its current policy period.
Expired – An Expired status indicates that given the information provided, the COI has expired and you should reach out to the Vendor to obtain their most current policy information.
No Coverage – A No Coverage status indicates that policy information was never entered into AmenityLinc. COI information is then recommended to be obtained and entered as demonstrated in STEP 6 above.